Tuesday, August 1, 2017

As the name suggests it’s a recipe with bhindi (okra) and onion as the main ingredients. Again a very easy and basic recipe of my blog, specially for beginners. It is a very common recipe of North India, made in almost all the North Indian families.

Pyazwali Bhindi / Okra Onion Recipe / A Typical Punjabi Recipe

 
I make it once a week or may be some time twice because my son is fond of this Pyazwali Bhindi (Onion/ Okra) a lot. You can also this recipe as the base recipe for Bhindi Do Pyaza. For Bhindi Do Pyaza you just need to add the onion two times. I’ll upload that recipe soon.

For this recipe you need to add onions in large quantity. I have used 2 large onions for ½ kg bhindi (okra). I also add in some dry mango powder as it adds in that touch of sourness and also reduces the sliminess of the Bhindis.

There are some tips to be remembered for making this Pyazwali Bhindi. You can find them in the Tips section below after the method.

Also I have uploaded the recipe video for better understanding of the procedure.

If you are looking for Bhindi (Okra) recipes, you can also go through the other Bhindi (okra) recipes on my blog Bhindi Stir Fry, Fried Masala Bhindi


Ingredients: (Serves 2)

500 gms Bhindi (lady’s finger / Okra) (chopped)

2 Large Onions

1 Green Chilli (Slit)

1 tsp Cumin Seeds (Jeera)

1 tsp Turmeric powder

1 tsp Red Chilli powder

1 tsp Garam Masala powder

1 tbsp Dry Mango Powder.

2 tbsp Oil

Method:

Firstly wash the bhindis nicely and dry them using the kitchen napkin. Remove the crown and the base tip of the bhindis and chop them. Do not chop them very thin, it should be about ½ inch piece.

Heat oil in a pan. Add in Cumin (jeera). 
Pyazwali Bhindi / Okra Onion Recipe / A Typical Punjabi Recipe
heat oil and add cumin

When the cumin seeds splutter and starts releasing its aroma put in the sliced onions.

Pyazwali Bhindi / Okra Onion Recipe / A Typical Punjabi Recipe
add onions


Saute till translucent and add turmeric powder.
Pyazwali Bhindi / Okra Onion Recipe / A Typical Punjabi Recipe
saute till translucent

Pyazwali Bhindi / Okra Onion Recipe / A Typical Punjabi Recipe
add turmeric powder


Mix well and cook for a minute.

Pyazwali Bhindi / Okra Onion Recipe / A Typical Punjabi Recipe
mix well and cook for 1 min

Then put in the chopped bhindis, green chilli and salt. Mix well and cook on medium to low flame till the bhindis become  tender and evenly cooked.

Pyazwali Bhindi / Okra Onion Recipe / A Typical Punjabi Recipe
add green chillies, bhindis, salt

Pyazwali Bhindi / Okra Onion Recipe / A Typical Punjabi Recipe
mix well

Pyazwali Bhindi / Okra Onion Recipe / A Typical Punjabi Recipe
tender and evenly cooked


Now add in the garam masala powder and dry mango powder. Mix well.

Pyazwali Bhindi / Okra Onion Recipe / A Typical Punjabi Recipe
add garam masala, dry mango powder, red chilli powder and mix well

Pyazwali Bhindi / Okra Onion Recipe / A Typical Punjabi Recipe
Ready to serve


Serve it hot with plain roti, it goes well with moong masoor dal tadka and a bowl of green salad.

Pyazwali Bhindi / Okra Onion Recipe / A Typical Punjabi Recipe


Tips:

After washing the bhindis dry them completely, else while cooking they would become slimy.

Be careful while mixing in the masalas with the cooked bhindis. Mix it very gently, as the bhindis would be tender so they would mash up.

Do not cover and cook, again the reason being the same, to avoid the bhindis get stick

Do not slice the onions very thin else by the time the bhindi gets cooked the onions would become brown and hard.


Make this food-a-licious Pyazwali Bhindi for your family and friends and let us know your experiences via comments.


Wednesday, July 26, 2017

French toast is also known as an eggy bread. It is a breakfast recipe which is very easy to make with easily available ingredients. It is a very good option for me whenever I am in a hurry or if I am not in a mood to do something complex.

French Toast (Sweet) – A Quickie Breakfast Recipe

 It is made of bread soaked in a mixture of eggs and milk with some sweetener, flavors and then fried till golden brown. I then drizzle some honey on it accompanied with some fruits. I have used banana and pomegranate; you can use fruits of your choice. It can also be topped with some whipped cream.

Have a look at the video uploaded.

The recipe calls for adding a dash of salt in it, but if you are frying it in salted butter, skip adding salt as I did.

Ingredients:

6 Bread slices

2 Eggs

½ cup Milk

2 tbsp Sugar

1 tsp Vanilla essence

1 tsp Cinnamon powder

Dash of salt (skip if using salted butter for frying)

Butter for frying

2 tbsp Honey (or as required)

2 Banana (sliced)

¼ cup Pomegranate seeds

Method:

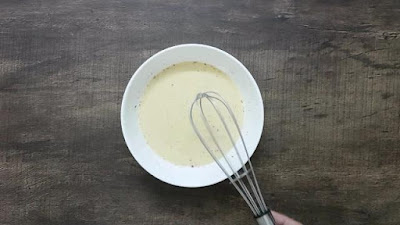
In a bowl take eggs, milk, sugar, vanilla essence, cinnamon powder. Beat it or stir with a whisk.

French Toast (Sweet) – A Quickie Breakfast Recipe
eggs, milk, sugar, vanilla essence, cinnamon powder

French Toast (Sweet) – A Quickie Breakfast Recipe
stir with whisk


Heat 1 tsp butter on a pan.

French Toast (Sweet) – A Quickie Breakfast Recipe
heat butter

Soak the bread in the egg bath. Both the sides should be coated well. 

French Toast (Sweet) – A Quickie Breakfast Recipe
soak the bread in egg bath

French Toast (Sweet) – A Quickie Breakfast Recipe
coat both sides

Don’t let the bread sit in the egg bath for long, else it would turn soggy.
Place it on the pan with medium heat.

French Toast (Sweet) – A Quickie Breakfast Recipe
place on pan

Flip the bread once it turns golden brown. It would take around 45 seconds, also depends on the heat.

French Toast (Sweet) – A Quickie Breakfast Recipe
flip

Cook both the sides till golden brown on slow to medium heat.

French Toast (Sweet) – A Quickie Breakfast Recipe
cook till both sides turn golden brown

Serve warm.

French Toast (Sweet) – A Quickie Breakfast Recipe
ready to serve


Top the French toast with some fruits and drizzle on it.

French Toast (Sweet) – A Quickie Breakfast Recipe


Tips:

Icing sugar can also be sprinkled on the top before serving.

Maple syrup can be used instead of honey.

Use fruits of your choice.

Thicker slices would need to soak for long in the egg bath and also cook longer.

Don’t fry the bread on high heat, as it would not be cooked evenly inside out.

Stale bread gives best results, as it would not turn soggy soon.


Try out this very yummy, healthy and easy to make breakfast and go food-a-licious with your family and friends.

And do not forget to share your experience with us via comments.

Tuesday, July 25, 2017

Coconut Milk Veg Pulao is same as our regular pulao. The highlight ingredient is the coconut milk. In the regular pulao the rice and veggies are cooked in water and here they would be done in coconut milk.

Coconut Milk Pulao / Veg Pulao In Coconut Milk

 
Coconut milk is highly nutritious and a rich source of fibres, vitamins, and minerals. Furthermore, it also adds in the richness and the sweet, floral, nutty flavor of coconut.

In the recipe I have used half coconut milk and half water, you can also use full coconut milk. The coconut milk used should be the thick one. Regarding veggies, you can add in your choice of veggies, do not restrict to just what I have added, put in your favorite veggies as per your taste.

Have a look at the full recipe video uploaded below.

Apart from this Coconut Milk Pulao, you can also look at my other pulao recipes Veg Fry Pulao, Veg Stir Fry Pulao


Ingredients:

1 cup Basmati Rice

2 tbsp Ghee

1 tsp Cumin seeds (jeera)

1 Black Cardamom

1 inch Cinnamon stick

1 Bay leaf

5 to 6 Curry leaves

1 Onion (thinly sliced)

1 tbsp Ginger Garlic (finely chopped)

2 Green Chillies (finely chopped)

4 to 5 French beans (chopped)

1 Carrot (chopped)

Some Coriander Leaves (chopped)

¼ cup Cashewnuts (fried or roasted)

Salt


Method:

Rinse the rice till the starch is completely removed. Soak the rice in water for 20 minutes.

Heat ghee in a pan and add cumin seeds to it.

heat ghee, add cumin seeds


When the cumin seeds start to release its aroma add in the whole spices i.e. black cardamom, cinnamon stick and bay leaf.

Coconut Milk Pulao / Veg Pulao In Coconut Milk
add whole spices


Saute till they become fragrant on low to medium heat.

Coconut Milk Pulao / Veg Pulao In Coconut Milk
saute till aromatic


Then add in the onions and curry curry leaves.

Coconut Milk Pulao / Veg Pulao In Coconut Milk
add onion and curry leaves


Saute till onions turn translucent.

Coconut Milk Pulao / Veg Pulao In Coconut Milk
saute till translucent


Then put in the finely chopped ginger, garlic and green chillies.

Coconut Milk Pulao / Veg Pulao In Coconut Milk
add ginger, garlic, green chillies


Again sauté till they turn light brown in color.


Now its time to add in the veggies (carrot, beans and green peas)
Coconut Milk Pulao / Veg Pulao In Coconut Milk
add veggies


Again sauté for a minute.

Coconut Milk Pulao / Veg Pulao In Coconut Milk
saute


Then put in the soaked rice and sauté gently for a minute.

Coconut Milk Pulao / Veg Pulao In Coconut Milk
add soaked rice

 
Coconut Milk Pulao / Veg Pulao In Coconut Milk
saute for a minute
Pour the coconut milk, add in some coriander leaves and salt to taste.

add coconut milk, coriander leaves, salt

Give it a gentle stir and allow the coconut milk to boil. Once the coconut milk starts boiling, stir gently and lower the heat. Cover and cook for 15 minutes.

Coconut Milk Pulao / Veg Pulao In Coconut Milk
cook and cover


Add in the cashewnuts and fluff lightly.

Coconut Milk Pulao / Veg Pulao In Coconut Milk
add cashewnuts
Coconut Milk Pulao / Veg Pulao In Coconut Milk
fluff gently


The Coconut milk pulao is ready to serve.

Coconut Milk Pulao / Veg Pulao In Coconut Milk


I like this pulao with any of the tomato based curry or even with just an onion salad.

Tips:

Add or deduct veggies as per your choice of vegetables.

While the rice is getting soaked start with the chopping of veggies and other preparation simultaneously. It would save your time.

After 20 minutes drain the rice.

After adding salt, taste the stock and adjust it as per your taste.

Check the pulao once after 10 minutes of covered cooking, and then adjust the further time as required.


Try this food-a-licious Coconut Milk Veg Pulao with your family and friends and let us know your experience via comments.

Thursday, July 20, 2017

Papad also known as poppadam is a very thin and is in the form of a disc. When hot it becomes soft and hence can be given any shape. And today we are giving it a cone shape. These cones would be further used as containers in which we can fill the stuffing of our choice. These papad cones can be made for get together, birthday parties as it is a kids delight.


Papad Cones / Stuffed Papad Cones / A Perfect Party Snack

For making the cones you need to be really quick. As soon as the papad is roasted you would have to give it a cone shape, as once it cools down it won’t be achievable. Keep a kitchen towel or tissue handy to hold it while making a cone as it would be very hot to handle.

You can see the procedure in the video uploaded

The stuffing can be made as per your choice and taste. I have used the potato stuffing mixed in with some spices and chutneys. To give it a crunch I have also used a farsan and then finally topped with nylon sev.

I have used medium sized papads and the measurements of ingredients given were sufficient for making 12 cones.

Once the papad cones are stuffed serve it immediately or else the papad would become moist and soggy.


Ingredients: (12 cones)

6 Papads (medium sized)


For Stuffing:

2 Potatoes (boiled and chopped)

¼ cup Moong (soaked and boiled)

1 Onion (finely chopped)

1 Tomato (finely chopped)

3 Green Chillies (finely chopped)

A fistful of Coriander (finely chopped)

1 tbsp Chaat Masala powder

2 tbsp Tamarind and Jaggery Chutney

1 tbsp Mint Chutney

¼ cup Farsan

¼ cup Nylon Sev

Salt

Method:

Cur the papads into half. Lightly roast the papad from both the sides on low to medium flame. Press it gently with a cloth to roast the papad evenly.


Papad Cones / Stuffed Papad Cones / A Perfect Party Snack
lightly roast the papad

Papad Cones / Stuffed Papad Cones / A Perfect Party Snack
press gently with a cloth


Transfer it to a kitchen tissue.


Papad Cones / Stuffed Papad Cones / A Perfect Party Snack
transfer to a kitchen tissue


Give it a cone shape. The tip of the cone should be made at the side from where the papad is cut that is the straight line.


Papad Cones / Stuffed Papad Cones / A Perfect Party Snack
give it a cone shape

Hold it for few seconds till the papad attains the cone shape.

 Keep the cones aside.


Papad Cones / Stuffed Papad Cones / A Perfect Party Snack
hold for few seconds
Papad Cones / Stuffed Papad Cones / A Perfect Party Snack
papad cone is ready


Now for the stuffing take all the ingredients mentioned in a bowl and mix well.


Papad Cones / Stuffed Papad Cones / A Perfect Party Snack
take ingredients of stuffing in a bowl


Papad Cones / Stuffed Papad Cones / A Perfect Party Snack
mix well

Fill it in the papad cones and top it with nylon sev.


Papad Cones / Stuffed Papad Cones / A Perfect Party Snack
fill the stuffing in the papad cones

Papad Cones / Stuffed Papad Cones / A Perfect Party Snack
top with nylon sev


Serve it immediately.


Papad Cones / Stuffed Papad Cones / A Perfect Party Snack


Tips:

Corns, cheese, capsicum can also be added in the stuffing.

Do not overload the stuffing with chutneys as it would make the papad turn moist very soon.

Roast the papad on low to medium heat.

Lightly roast the papad we do not want them to turn brown.

Serve immediately, as the stuffing is a bit moist the papad cones would become soggy soon.


Enjoy this lip smacking party snack and make your family and friends go food-a-licious with this very interesting recipe.

Share your experiences with us via comments and do not forget to subscribe our YOUTUBE CHANNEL for more such food-a-licious recipes.